
One of the easiest approaches to give your house a new look is painting a room. Many, however, worry about transforming their area into a stress-filled disaster zone dotted with splatters and spills. The good news is you don’t have to be professional to keep things neat or perform a fantastic job. You can paint your room without making a mess with some basic advice, the correct tools, and a little planning. Maintaining cleanliness is quite feasible whether you are altering the color of one wall or the whole space. Let’s walk step-by-step through the process to enable you to complete it without additional cleanup effort.
Clear the Room Before You Start Painting
Getting things out of your way will help you avoid mess the easiest. Eliminate as much furniture from the room first. Push anything too heavy or awkward to move to the middle of the room and cover it with a plastic sheet or drop cloth.
Remember the little things as well: pull down curtains, disconnect appliances, and clear rugs. Additionally, disappearing should be outlet covers, switch plates, and wall hangings. This little chore will help you avoid unintentionally splashing paint where you don’t want it.
Stow the screws and bits you remove in compact boxes or zip-top bags. Name them so you will know where they disappear. Your room will be easier to walk about, paint freely, and minimize inadvertent spills the more empty it is.
Use Drop Cloths and Tape to Protect Surfaces
One wise technique to guard against drips and splashes is covering the floor and trim. Depending on what you have on hand, you might use plastic sheeting, canvas drop cloths, or even old bed linens. Just make sure, when you step on it, the stuff doesn’t slip.
Additionally, it is useful for taping over electrical outlets and light switches. On post-paint touch-downs, you save time and present a better appearance. Use tape to hold big surfaces covered by plastic or paper in place so they won’t move while you work.
Prep the Walls for a Smooth Paint Job
Many people ignore this stage and come to regret it later. The appearance of the paint and the mess issue can be improved significantly by preparing your walls. To eliminate dust, oil, and stains, first gently wash the walls with a sugar soap or light soap solution. Just perfect would be a sponge and warm water.
Check the walls for holes, dings, or flaking paint once dry. Fix any flaws with spackle or filler, then sand them down until smooth. To eliminate sanding dust, once more, wipe the walls with a dry towel.
If your walls are shiny or past-painted, gently sanding them will improve the fresh paint’s adhesion. Ignoring this section could result in uneven paint or later peeling off of spots. The early effort here saves a lot of subsequent rework and cleanup.
Choose the Right Tools for the Job
Painting faster, cleaner, and more precisely depends on using the correct equipment. Get premium brushes and rollers free of fluff or braggle shedding. For corners and edges, a 2-inch angled brush is ideal; a roller covers more ground fast and evenly.
Choose the appropriate nap—thickness of the cover—if you are rolling. While textured surfaces could call for a thicker nap, smooth walls fare best with a thin one. Additionally, less mess and simpler cleanup will result from a paint tray with a liner.
If you work close to ceilings, remember a ladder; also, wear old clothing or a painting smock. Additionally, gloves and a painter’s cap help shield your hands and hair from errant splashes.
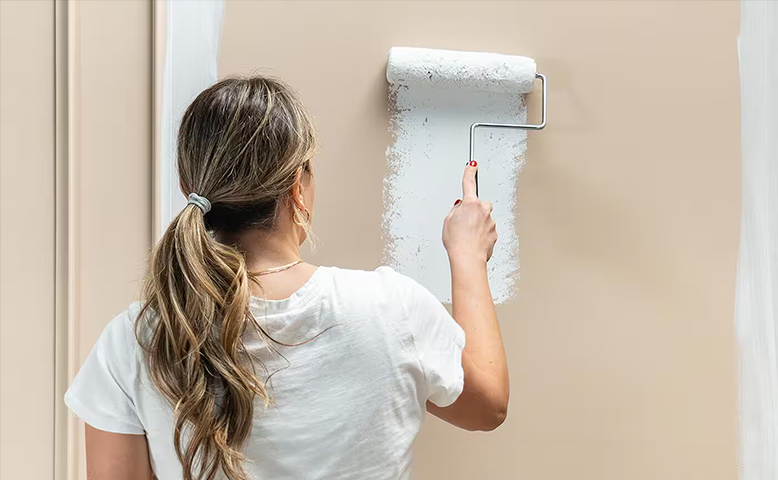
Use the “W” Technique to Prevent Drips
Commonly occurring when you overburden your brush or roller are drips and stains. Don’t dip your brush very far into the paint to avoid this. One just needs the bottom third. Pour paint into the tray with rollers; roll off the extra before painting the wall.
One easy approach to achieve even covering free of clutter is the “W” technique. Paint in a W-shaped pattern, then use horizontal strokes to fill in the voids. This guarantees even paint distribution and helps to avoid lines and clumps.
Work slowly and avoid rushing. If you spot a drip, quickly clean it with a paper towel or damp cloth. Keeping a rag close by will protect your floor, trim, and even your clothes from unplanned splashes.
Keep a Wet Edge and Avoid Overworking
Returning over areas that are already beginning to dry is a simple method to create a mess. Uneven drying of paint can leave marks; however, trying to correct them later usually results in smearing or splattering.
Maintaining a “wet edge” by working fast from one region to the next without stopping for too long helps one prevent this. If at all possible, paint one entire wall at a time. Beginning close to the top, work downward to catch any drips as you descend.
With your brush or roller, avoid pressing too firmly. Better results come from light—even pressure—which also helps to prevent paint splattering. See the label for drying periods; always wait for the first coat to dry before applying the next.
Clean Up Promptly and Properly After Painting
Clean up right away after you’re done. Cleaning becomes more difficult the longer paint is on your brushes, rollers, or trays. If you use water-based paint or mineral spirits for oil-based varieties, rinse tools with warm water.
Ideally, after an hour or two, remove the painter’s tape before the paint dries entirely. Too long waiting could cause the paint to peel alongside the tape. For optimal results, slowly and at an angle, peel it off.
Carefully grab the drop cloths, folding them inside to prevent any paint from contacting the ground. Change the outlet covers, rearrange your furniture, and quickly scan the space for any missed touch-ups or spots. At last, empty paint cans should be disposed of following local recommendations.
Conclusion
Painting your space does not imply hours of cleanup and paint splatters. You can confidently and cleanly finish the project by slowing down with setup, selecting appropriate tools, and working carefully. Every action helps to maintain control, from clearing the area to arranging the last piece of furniture. These basic ideas can help you get excellent results—without the turmoil—regardless of your first experience or tenth. So go ahead and grab that brush; your next paint job just became much simpler.
